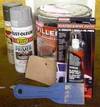
Sometimes your car will receive a dent or gouge that's too small to justify the expense of a full body shop repair but too big to simply ignore. You can cut your repair costs by doing the body work yourself. We'll show you how to properly use body filler to repair a dent. The main ingredient you'll need is patience. A rushed body repair never ends well. Take your time and you'll have great results. What You'll Need: • sandpaper - 120 grit, 240 grit, 400 grit wet/dry • body filler (with hardener, usually included) • glazing and spot putty • rigid plastic spreader • flexible plastic spreader • automotive primer
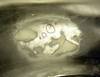
Before you can fill your dent, you'll need to remove the paint. Body filler doesn't stick well to paint, so you need to sand it down to bare metal. For this job, you can use a heavier grit sandpaper like a 120 - grit. You want to get the paint off fast, and you'll be smoothing things out later anyway. Even though your dent may be only a couple of inches long, you'll need to remove more paint than that. At least 3 inches beyond the dent is needed (you'll see why later). So you'll be taking at least 6 inches of paint off the car.

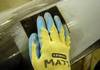
Body filler is a two-part epoxy that you have to mix yourself. You add a creme hardener (comes in the can) to the base filler, which starts a reaction to harden the filler. The filler will harden pretty quickly, allowing for less than 5 minutes of working time. Follow the directions on the filler can to mix the proper amount of hardener with filler. Mix the two using a rigid plastic spreader. Don't forget you have a limited working time once you mix it!
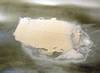
Using a flexible plastic spreader, spread filler in an area at least 3 inches outside of the actual damage. You'll need the extra space to properly smooth and feather the hardened filler. Don't worry about being too neat with it. You'll be sanding away any ugliness once the filler hardens.
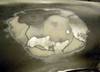
Start sanding the filler using 120-grit sandpaper. Sand lightly and evenly over the entire surface of the repair with broad circular strokes. Sand past the edge of the filler to create a smooth transition. When the filler is pretty close to smooth, switch to the 240-grit paper and continue until it's even.
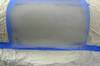
To further prepare and protect your repair, you'll spray the surface with a primer/sealer. Mask off an area around the repair to avoid getting paint on any trim or other non-painted areas (don't forget, you don't want paint on your tires, either). Apply the spray primer in light, even coats. Three light coats are better than one heavy coat.
Allow the primer coat to dry, then remove your masking tape and paper. To smooth the repaired area for painting, you'll use your 400 grit wet/dry sandpaper, but this time you're going to wet sand the repair. Fill a spray bottle with clean water and spray the repair area and the sandpaper. If you don't have a spray bottle you can use whatever method you can to keep the paper and repair area wet. Smoothly sand the primer using a straight back and forth motion. When you begin to see the old paint show through the primer, you've gone far enough. If you sand away too much primer and you can see metal again, you'll have to re-prime and re-sand. You've now successfully repaired your car's body!